The previous weekend had been a real stinker as far as the weather was concerned with rain and more rain in the middle of July. So I was glad on Friday 22nd that the forecast for the Saturday said it would be soarable. I set the alarm the evening before and even missed out on going to a party because I knew I would be up early and flying the next day – such dedication. A shame as I enjoy a good dance and later heard it was a good shindig.
An early start the next morning getting to the club for the 8am glider ballot with my eye on the retractable version of the Baby Grob – SH7 – which I had flown the previous time and really liked. As it turned out there were only two of us each having a choice of three gliders so no need for drawing lots and we put our names down for our respective aircraft.
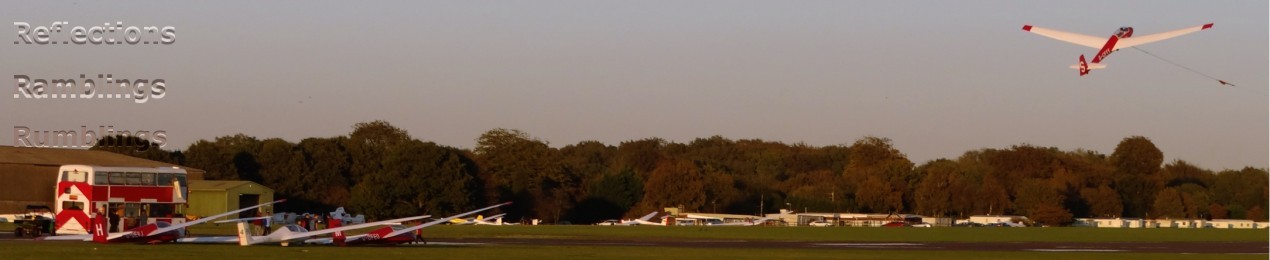
Then I noticed an even earlier riser who had put the very first, and lonesome looking glider on the grid. I had to have a photo of that and it turned out there was a small tale to this glider. The pilot launched at about 11am and didn’t get back until about 7pm, calling up on the radio in the evening when I was running the launch point for the Lasham Youth cadets. Hats off to the pilot who I believe is the BGA chairman – well, he is down as the owner. I can only aspire to such an accomplishment at the moment.
At the morning club briefing the forecast was good although with some overcast spreadout later in the day. Once again I could see that even at 9am the conditions were developing quickly. I was so impatient to get flying that I forgot to put on sun tan cream – which with a fair skin like mine is bad omission.

08:05 : The lone first glider on the grid in the morning.
Is the owner a physicist by any chance? (Zoom in to look at the registration)

08:47 : Morning clouds starting to build as the launch point vehicles get their DI (Daily Inspection).
The clouds got larger and I got impatient.


Explanation: Post-Launch and Pre-Landing checks – or its TUF crying WULF.
The post launch checks are important since if you forget to raise the undercarriage after launch it is possible you will raise the undercarriage before landing because you will be out of sync. This seems crazy – of course I know which way the lever should go! – but landing can happen under pressure so mistakes can easily be made.
Post-Launch checks mnemonic is TUF for:
T – Trim.
Adjust as required for the flying conditions.
U – Undercarriage.
Raise the undercarriage.
F – Flaps.
If fitted set them as required for the flying conditions.
Pre-Landing checks mnemonic is WULF for:
W – Water – Dump the water ballast.
This can take a good number of minutes, the Baby Grob manual says it needs 3 minutes. The Discus needs 5.
U – Undercarriage – Lower the undercarriage.
The important thing here, apart from remembering to do it, is to make sure it really is locked. SH7 has had some landings where the undercarriage “collapsed” because the lever had not been moved far enough forward to lock it.
L – Loose articles; Landing area; Lookout.
Loose articles includes the pilot! i.e. Check your straps. Check the Landing area for obstructions etc (though there is a whole another mnemonic for field landings), and Look out. At Lasham the latter is drilled into you since it can be very very busy in the circuit.
F – Flaps.
Set flaps, if fitted, to their landing position.
The Lasham manual page for these is here.

WULF, U/C, plus the QFE and QNH pressure settings.
What I did remember to do was stick a piece of paper on the instrument binnacle to remind me about lowering the undercarriage before landing. In this case there are apparently two sorts of pilot, those who have landed with the undercarriage up, and those who have not – yet.
The first launch of my day was off the winch and I only got to 1200 feet. It looks like I need to talk to an instructor to get some tips. Although I did connect to some very weak lift I decided to go off in search of better air and failed miserably to keep flying – I came down within 8 mins! Later in the bar I was roundly ridiculed by a fellow member of similar ability because I did not stay in the weak lift – fighting to climb away from the winch for half an hour like he did. So…
Lesson 1 of the Day:
Must try try harder from winch launches and not give up so soon.
Not that I am worried about my credibility in the bar you understand!
Due to a delay with the winch queue, for the next flight I decided to take an aerotow up to 2500ft which enabled me to learn the foibles of SH7 and also find decent lift. Not only was there some good lift, but there was also a copious amount of fast sinking air. I have not previously experienced such extensive downdrafts as strong as these – you rejoice on climbing up 500ft, which can be a struggle, and then to lose it in 1 minute because you hit some fast sinking air is depressing both psychologically as well as in height terms. However I did manage a 2 hour flight this time.
If you don’t know what QNH and QFE stand for I have put an explanation at the bottom of this post.

12:25 : Lasham from around 3500ft.

12:26 : Picture taken towards Odiham of a "working" sky.

12:27 : 400ft/min going down. Ouch. Struggling to find the lift.
Today was an object lesson about how thermals are not always circular. We get all this training about how to circle in a rising bubble of air, trying to centre in it properly, but now I am finding that the lift is anything but circular.
Lesson 2 of the Day:
Lift is not always circular.
The best time of the flight came when I spotted some seagulls as I was circling in some mediocre lift. As there were no gliders nearby I decided to try and circle underneath the birds. There have been a few other times when I have managed to do this and I always find it to be a wonderful experience. This time I found that in order to follow the seagulls my circles were very irregular, however I did manage to stay in the lift and gained some useful height. Unfortunately this only lasted for a short while before the seagulls disappeared, but it still felt great to be “flying with the birds”.
Lesson 3 of the Day:
Birds are smaller and more manoeuvrable than gliders and you cannot keep up with them.
After the flight it was a landing further into the airfield (called landing “long”), to park up by the hangar for cleaning duty. After this was done I helped the other early rising club member from the 8am ballot to de-rig the Discus. I was anxious to help out since I need to learn how to do this myself. Luckily it was not too hard, but will need someone to help. I am hoping to talk more about these lovely looking gliders later on in my flying development, once I am cleared to fly them. Hopefully before the end of the year.

14:15 : SH7 retractable Astir cleaned up before being packed back into the hangar.

Shot of SH7's cockpit after the flight.
Explanation: Cockpit Contents.
You can see here a shot of the roomy interior showing the items I usually take.
Items going clockwise from the bottom centre, including the easily visible control levers, are:
– One parachute – of course. Only the best dressed pilots have one, it does wonders for the look of your trousers when walking around outside the aircraft!
– One bottle of weak elderflower drink. I can’t stand having just water so I always add a bit of taste in, which also seems to help stop leaching salts out of me. My medical knowledge on this may be suspect, but I do notice the difference. One of my next todo items is to get a backpack drink system because it is too much faff to get the bottle out while you are trying to chase seagulls in a glider!
– One aviation map. Due to force of habit I always carry this with me, even when going for local flights. I also like to have the latest MemoryMap map in my phone since they do the proper aviation maps and it is always good to get confirmation by GPS, although I don’t rely on it.
– Green Trim Lever.
– Blue Airbrake Lever.
– Yellow Cable Release Handle.
– Joystick. Definitely need one of these.
– Silver Undercarriage Retract Lever. Forward all the way for down.
– Red Emergency Canopy Release Lever.
– One handheld radio as a spare. Always good to have a spare radio in case there are problems with the on board setup, say like a flat battery. Though the on board radio is going to be more powerful than my handheld one. From this you can start to get the idea that I might be a control freak!
– Microphone for the on board radio.
YOUTH EVENING TIME
After my day of flying, it was time to get ready for the youngsters turning up for their evening training. So back to the clubhouse for a scone and a cuppa and then over to the launch point.
As you can see from the first of the following photographs, it turned out to be a beautiful evening. There was plenty of enthusiastic help to run the launch point and we even had enough winch drivers to have both winches working, so our launch rate was prodigious! We had a total of 40 launches done before the end of the day – many thanks and well done to all the youth, parents and instructors who helped.
Then later, as usually happens, one of the instructors starts touting for ballast – sorry passengers – towards the end of the evening to see who wants to come and partake of some aerobatics in a K21. There is never a shortage of takers.
In a future post I will use the winch photographs to help describe how we handle bringing the cable back from the winches to the launch point.

19:33 : A silver lining in the evening.

20:02 : Picture showing the twin winch operation of the evening youth group.

20:16 : John can never resist the late evening aerobatics before putting the K21 away.

Altimeter in SH7 showing a height of 2760ft.
Pressure setting is mid-right of image and is set to 992, the QFE at Lasham.
Adjustment knob is bottom left of image.
Explanation: QFE and QNH Pressure Settings.
The abbreviations in the caption of the previous photograph are part of the Q Code from the early days of radio. Although I will not go deeply into the subject here I just want to highlight that the Altimeter in an aircraft is simply a barometer that measures the ambient air pressure. As you go higher the air pressure falls because the air gets thinner. This happens in a regular way so that it is possible to make such an instrument that usefully shows you your height – certainly at the altitudes recreational pilots usually fly. The altimeter has a knob to set the reference pressure setting at which it will indicate zero feet. That is what is shown bottom left of the altimeter photo here and you can see that it is calibrated up to 20000ft. The altimeter pressure setting is in millibars, where 1000 millibars is 1 bar, about 14.5psi.
Just in case you get confused about the usage of words like height or altitude, they have specific meanings in aviation. Height is how high you are above the ground, and Altitude is how high you are above sea level, and I will use these meanings in the rest of this explanation.
For the altimeter to show you your height, you need to set the reference air pressure at the reference point on the ground. This is where the Q code word QFE is used. “FE” stands for “Field Elevation”, i.e. the altitude of the airfield, and the QFE is the pressure setting at this altitude. By setting your glider’s altimeter to this pressure setting it will show you how high you are above the airfield. Just what you want for local flying.
You can also do it the other way around which is what I do before launch. I set the altimeter to read zero feet while on the ground and then I read off the pressure setting, which is the QFE figure. This is the first figure I write on my piece of paper.
So what is QNH? Here “NH” stands for “Nautical Height” and, as you might guess, is the pressure setting at sea level. If you set the altimeter to the QNH setting, it will give you the altitude of the aircraft above sea level. If I know the altitude of the airfield above sea level – for example Lasham is 620ft – all I have to do is adjust the pressure setting knob until the altimeter shows 620ft, and then read off the pressure setting. This will be the QNH and is the second number I write on my piece of paper.
Measuring the pressure settings when the aircraft is on the ground is a good idea, because when I am flying I can then adjust the altimeter pressure setting to those numbers without having to think too hard and the altimeter will show how high I am above the ground if set to QFE, and will show how high I am above sea level if set to the QNH.
I need to know these numbers because the aviation maps will usually show altitudes of not just ground features, but also airspace. Another set of numbers the map shows are “Flight Levels”, but that is for another time because my brain hurts and I bet yours does too. If you get a chance to go flying ask your instructor to allow you to play with the altimeter setting and explain to you what is going on.
Suffice it to say that before every flight I fiddle around with the altimeter and write down both the QFE (Field Elevation) and QNH (Nautical Height) pressure settings. If I am not at Lasham my aviation map will show me the altitudes of all the airfields so I can easily find out the QNH.

21:38 : Glider tucked up in bed for the night. The next day was going to be really good - but I wouldn't be there. Shame.
All in all a long day for yours truly from 8am to 9:30pm, but once again a very rewarding and content feeling as, back at home, my head hit the pillow and I went straight off to sleep.
Night night, sleep tight…

Hello Charles; STUNNING pictures of the sky, the clouds, the gliders, earth from above.
As you might remember, I am afraid of flying (or rather, at the instant of awareness prior to the plane falling down and crashing). Nevertheless, I always ask for a window seat, so I can enjoy looking at the clouds formations, and I can feel wonder by their movements, hues of color, textures, shapes, etc.
Once, (eons ago), I flew from Chicago to Minneapolis in stormy weather, bad enough that I doubted the pilot’s mental status’s clarity when it was announced that the flight was departing. The flight had already been delayed -seven hours- due to the weather conditions (no complaints from me).
Though in a state of sheer panic, I sat by my window and looked out, it was around midnight, so there was not much I could see. Then suddenly, I saw light coming closer and closer, I began to look blueish -I speculate- due to fear induced lack of oxygen intake. But then … it happened, we flew by a cluster of illuminated clouds, and I could see lightning coming from within the cluster. It was just there, like a miracle, parallel to my window’s viewpoint. I was mesmerized. We flew by it until it was left behind (few minutes).
It was a sight that I have never forgotten, it was a natural “high”!!! All fear about crashing was gone. Beauty prevailed, and I felt in peace (probably one of the very few times in my life). I was glued to that window like one of the flattened flies on the gliders wings. In a way, that cloud/lighting was never left behind, it stayed with me, and still is.
I believe that I witnessed (granted that I know nothing about atmospheric theory) “the birth of lightning.” You never know when grace will fall upon you.
Anyway, thanks you for letting me know about your “blog.” I confessed that I did not read much of the technical stuff, … well, none of it really. I just loved the images. Ciao, ciao … and fly safely. AM